Optimizing Detail Creation, Referencing and Cataloging: Compiling, Managing and Integrating Your Own Detail Libraries (Part 3 of 3)
bу Eric Bobrow, May 30, 2007
originally published in AECbytes – Tips and Tricks Issue #18
In part 1 of this series, we looked at ArchiCAD’s Detail Marker Tool and the basic process of creating a callout and editing a detail drawing. Part 2 explored how to use parametric 2D object components (from the standard ArchiCAD library) as well as the free, downloadable Detailer Template to work on these drawings more quickly and efficiently. This month, we’ll focus on compiling, managing and integrating your own libraries of details.
Reusing Your Detail Drawings
After creating a detail drawing for a particular project, you can reuse it for similar contexts in other buildings. The simplest way to do this is to copy it from the original file into your current project.
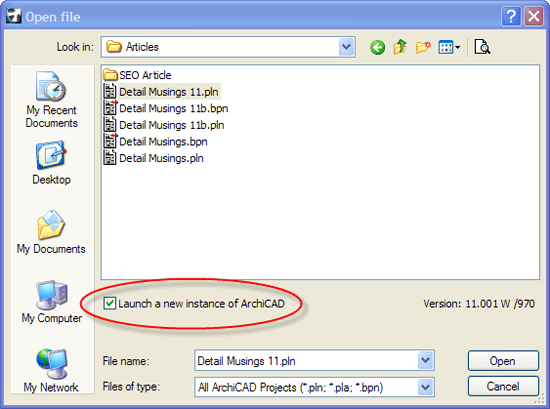
With your current project open, go to the File menu and choose Open, and select the earlier PLN file, making sure to check the box to Launch a new instance of ArchiCAD.
Navigate to the Details section of the Project Map, and double-click to open the detail drawing. It may be better to locate the detail drawing in your View Map, and open it from there, to make sure that the correct layers and scale are active. Make a note of the drawing scale (e.g. 1 ½” = 1′ – 0″), since you will want to use the same scale for the detail in your current project.
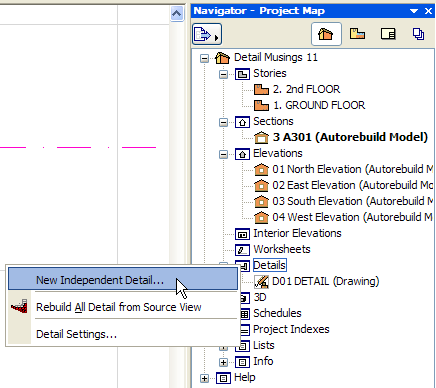
Switch back to your current building PLN, and in the Details section of the Project Map, right-click on the Details heading or any Detail drawing in the list, and select New Independent Detail.
In the dialog box, name it appropriately and click OK. Double-click on the newly created entry in the Details section to open the blank drawing area. Set the scale to match the source detail. Paste in the drawing that you copied from the other project.
Go to a location where you would like to call out this detail (e.g., a section, elevation or plan view). Activate the Detail Drawing tool by clicking it once in the Toolbox. In the Info Box or within the Detail Settings dialog, choose to create a callout linked to an existing detail drawing. Browse for the recently created independent detail and select it. Then place the callout marker in the section (or elevation, etc.). Your new callout will link to the copy of the detail you have brought in from the other project, and can be accessed by right-clicking on the callout and choosing Open Detail Drawing. To link to this detail from another section (or plan, etc.), you can repeat this procedure.
To place the new detail onto a layout, follow the usual procedure. You can right-click in the Detail Drawing window and choose Save View and Place on Layout. Alternatively, in separate steps, with the detail drawing open, go to the View Map, click the button to Save Current View, move that View into your folder of Details in the View Map (it’s a good idea to organize your Views into folders), then later drag that View onto a Layout.
You can repeat this whole process any time you want to reuse a detail from another project. The copy you paste in is now independent, so it can be modified if needed to suit the current context, without affecting the earlier PLN file.
Manufacturers’ Details and Other Collections
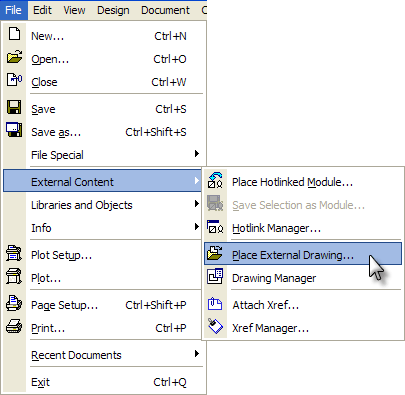
You can also import manufacturer details in either DWG or PDF form using a variation of this method. Simply create the independent detail drawing as above, then instead of pasting from the other project, place the detail in the blank window as a complete Drawing. You may use the Drawing tool from the Toolbox, or choose File menu > External Content > Place External Drawing. You can also “drag and drop” one or more drawing files from a folder of DWG or PDF files, either into a Detail Window or directly onto a Layout sheet.
If you bring in a PDF, you cannot modify it easily, but you can crop it by changing the drawing frame polygon, or clipping out holes in the drawing to hide parts that are not relevant. You can then add text or additional graphics if desired.
If you place a DWG as a Drawing element and would like to edit it, choose Edit menu > Reshape > Explode into Current View and then rework the linework and text as desired. TIP: This approach (place as Drawing, then Explode) has the side benefit that all the components end up on the same layer as the Drawing element, rather than adding multiple layers to your project layer list.
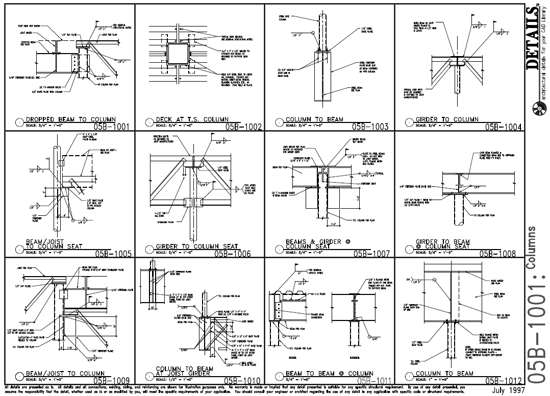
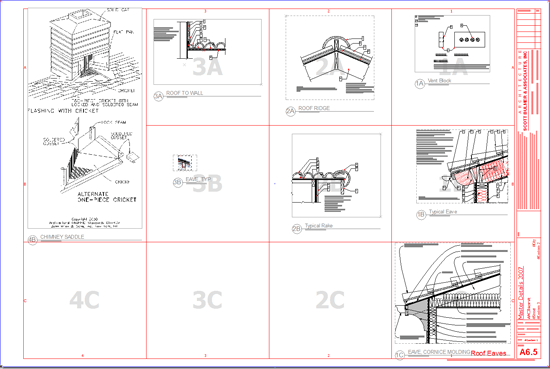
There are some collections of detail drawings that are available for purchase. One that BCG sells is called Details Collection 3000 CD, which is available as a download or a CD. This set of 3000 drawings is organized by CSI category, and has a nicely organized PDF file for browsing reduced size versions of the drawings, as shown below. The actual detail drawings are stored in DWG format, and can be dragged and dropped into a Detail window in ArchiCAD. Their website (http://www.details-details.com) has full information, and you can download about 300 sample details to see how they look and how you can import them.
Other collections can be found online if you Google “architectural detail drawings.”
Creating a Catalog of Your Details
Once you have amassed a number of details in many projects, the task of finding and opening various files to locate just the right detail may become tedious and inefficient. Creating a single file, or a few focused on particular types of construction (wood frame vs. concrete, or residential vs. commercial, etc.), with a collection of all your details is an excellent way to optimize your workflow.
Create a fresh PLN, and create new Independent Details in the Project Map. Make sure each one has an appropriate name, since this will become the View name and later the Title when placed on a Layout. It’s a good idea to create a system for reference IDs, such as D.RF 01 for Roof Detail 1, D.WL 12 for Wall Detail 12, etc.
Go through each of your projects and locate details that may be reusable. For each one, open the detail, activate the Arrow tool, choose Edit menu > Select All, then Copy. Go back to the detail catalog PLN, create a new Independent Detail (or locate one you have created but not filled), open it up, make sure the scale is set appropriately, then Paste. Repeat until you’re done, at least for the time being.
For each detail in your catalog file, you will need to create a View with the appropriate scale, Model View Options and dimensioning settings, etc. The name of the detail in the Project Map will become the name in your View Map. To simplify layer management, place all drawing elements onto the ArchiCAD layer so they are always visible whenever the detail is placed.
If you use a custom Pen Set for a detail drawing in the source project, you will want to use the same Pen Set in your catalog file. You can copy Pen Sets from one PLN to another using Options menu > Element Attributes > Attribute Manager.
In ArchiCAD 10, Pen Sets are part of the Drawing Settings on Layout sheets, to ensure they always appear and print with the correct, specific pen weights and colors. In ArchiCAD 11, this capability is expanded and View Settings record Pen Set information as well, so that what you see when looking at the View is exactly how it will output from the Layout (WYSIWYG). If you use more than one Pen Set, be sure your View Settings have the correct Pen Set, both in the catalog and later in your active project.
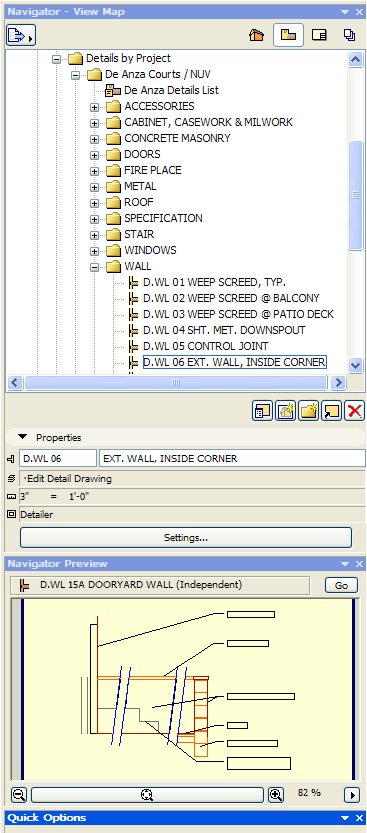
It’s a good idea to create separate folders within the View Map for different categories: Wall Details, Roof Details, Foundation Details, etc. You can also create folders for projects (and make duplicate Views if you wish) to allow details to be grouped by the project for which they were originally created. Each detail, of course, can be at a different scale.
Once you have this catalog PLN created, you can find your details more easily: there is only one file to open. You can browse your drawings quickly using the Navigator Preview, as shown below. Open the desired folder in the View Map and click on one entry after another until you find what you need. Then simply double-click to open the drawing, select all, Copy, then go back to your current project detail window and Paste.
Printed and PDF Reference Catalogs
In your catalog, you can create Layouts and place your collected details. These can be organized in any way you wish, on any size paper. You might do this on full size architectural sheets (24″ x 36″, etc.) or on letter size paper, or both. If you use smaller sheets, you can place the details smaller than actual scale (perhaps at half-size) so that you can fit more drawings onto the sheet.
You can show the drawing reference ID along with the Title so the drawings will be quicker to locate in the View Map. The catalog can be printed or saved as a PDF and browsed onscreen.
Referencing the Catalog Externally
In ArchiCAD 10 and later, you can place Drawings on your Layouts as an external reference. Using the Project Organizer, Browse and open or select the Detail Catalog PLN on the left side, and locate the desired View from its View Map. Drag the View into the Layout on the right side of the Organizer, or simply drag that View directly onto the Layout sheet.
This has the advantage of being quicker and simpler than opening each Detail in the catalog and copying, and creating Independent Details in your project and pasting, then placing onto the Layout. One benefit and/or caution is that the detail is linked to the catalog, and will update if the detail in the catalog PLN is updated. Of course, you cannot right-click on the callout to open the detail for editing, since it is external.
There is a limitation to this approach in ArchiCAD 10 that is removed in ArchiCAD 11: the drawing reference in the detail callout (e.g., drawing 6 on sheet A-401) will not be automatic. In version 10, these references are only possible when the callout is linked to a detail drawing inside the same project that has been placed onto a Layout.
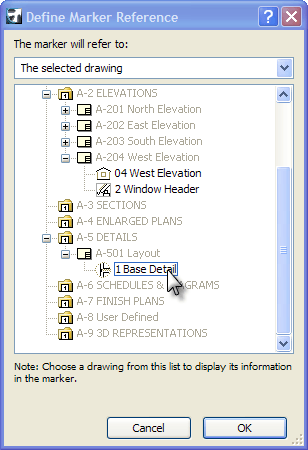
In ArchiCAD 10, you may use the Custom settings for the drawing number and sheet number, and enter them yourself. This is not much of a problem on standard detail sheets that are consistent from project to project, since these drawings will be in the same position on the same page. Happily, this limitation is removed in ArchiCAD 11, which allows a call-out to reference any placed Drawing in the Layout set. From the Info Palette or the Detail Marker Settings dialog, choose Linked marker.
In the Define Marker Reference dialog box, select from the upper popup to refer to The selected drawing. Then browse for the appropriate drawing (it must already have been placed on a Layout) from the list.
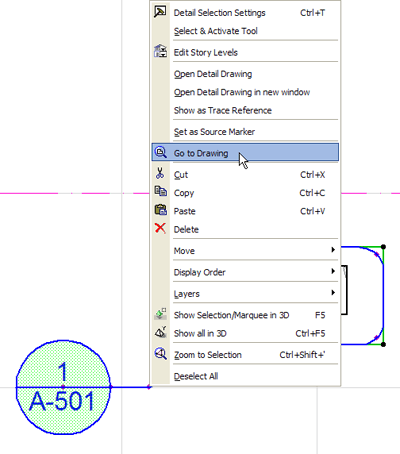
Your call-outs will always be up to date, and you can view the detail drawing by right-clicking the callout and choosing Go to Drawing.
In a larger office, the detail catalog can be set up as a Teamwork file (PLP). The CAD Manager or lead detailer is allowed to modify the catalog, but other users may only be given permission to read and reference (or copy) the details.
Organizing Details on Floor Plan Stories
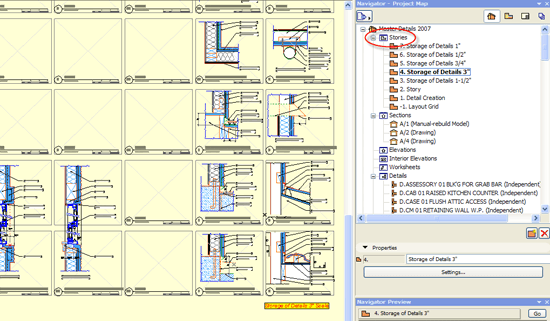
Another way to create and browse detail drawings in a catalog is to compile them on Stories (in addition to Detail windows). This offers one advantage: you can use the Wall tool to create the graphic fills for composite walls. In the Detail window, the Wall tool is not available, so representing a composite wall section from scratch takes a little more time, using a series of individual rectangular fills.
Another benefit is that with the details arrayed on a floor plan, you can scan many details at the same time to pick one out by eye. You can also Drag a Copy of any detail to instantly create a variation.
It is possible to create a View for each detail on a story: zoom in carefully to show only the desired area, then save the active Zoom in the View Settings. These Views can then be organized within the catalog View Map. You can browse details by name, double-click to view, then zoom out to compare similar details nearby on the same story.
However, it is not advisable to place these zoomed and cropped floor plan Views as drawings on Layout sheets, since rebuilding each detail drawing (making sure they are up to date) will take much longer. This is because the entire story, with many detail drawings, is read each time for every placed drawing. It’s best to maintain a copy of the details in separate Detail windows using the method described earlier, and place simple (uncropped) Views of those Detail windows on the Layouts.
NOTE: if you create a detail on the Floor Plan to take advantage of using Walls for some of the graphics, then later want to paste the drawing into a Detail Window, one extra step is needed in version 10. You must Explode the Walls (Edit menu > Reshape > Explode into Current View) to convert them into 2D graphics before copying, otherwise they will not paste into the Detail Window. In version 11, this is unnecessary since wall and other construction elements are converted to 2D graphics automatically when the drawing is pasted into the Detail Window.
Each story can include many details, which might be grouped into categories (e.g., roof details). Details of different scales should be placed on different stories, so that their text and markers are sized properly. Each story will have a particular scale (e.g., 1 ½” = 1′ – 0″, etc.) and the drawings can be placed freely, or arranged on a grid.
Detailer Template in the Catalog
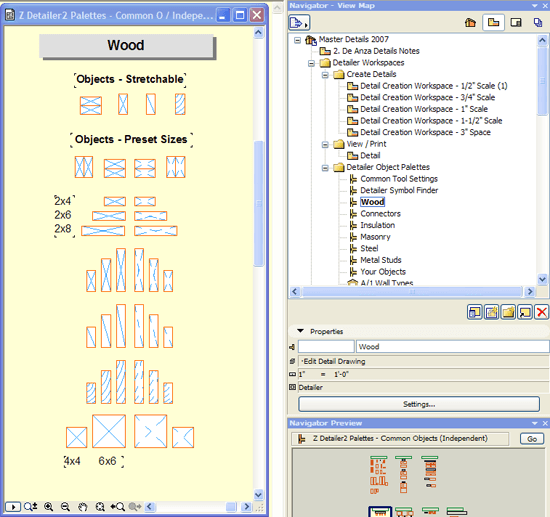
The detail catalog can also be a place to create new details. The Detailer Template system described in the previous article of this series can be integrated into the catalog PLN so that all the tools are available to quickly create details from scratch, as variations of earlier details, or from graphics copied from a project.
Instructions for how to add the template modules (e.g., wood, steel, masonry, etc.) into a PLN (which could be a project file, a project template, or a detail catalog) are included in the Detailer Manual pdf file.
Conclusions
The tools in ArchiCAD for creating, managing and cataloging detail drawings are powerful, elegant and simple to use-once you know what’s possible. Use the Detail tool, the 2D pre-made library parts, the Detailer template, and compile your own catalogs of details. Your projects will be well-detailed, without any wasted effort.
Acknowledgements
Thanks to Scott Bulmer for sharing his detail catalog file (a work in progress) for use in training and making screenshots for this article. Thanks to Richard Morrison and Erika Epstein for sharing similar files and brainstorming with me on best practices for creating office standard collections of detail drawings.

