ArchiCAD Tutorial | The ArchiCAD BIM Experience Kit
bу Eric Bobrow, September 25, 2007
Originally Published in AECbytes Tips and Tricks Issue #22
This summer, Graphisoft released an innovative interactive tutorial for ArchiCAD called the BIM Experience Kit. It is offered as part of a free 30 day ArchiCAD Trial Version, allowing prospective or new users the opportunity to “get their hands on ArchiCAD” and learn the basics of Building Information Modeling (BIM). The tutorial may be downloaded along with other free “Interactive Training Guides” (ITG’s) from http://www.graphisoft.com/products/archicad/ac11/itg/.
The Massaro House project used for the BIM Experience Kit is unique: a Frank Lloyd Wright design that was built decades after he created his original drawings. It’s a great focus for this hands-on experience that allows 2D CAD users to complete an entire building using 3D BIM processes in literally just a few hours.
Download and Install
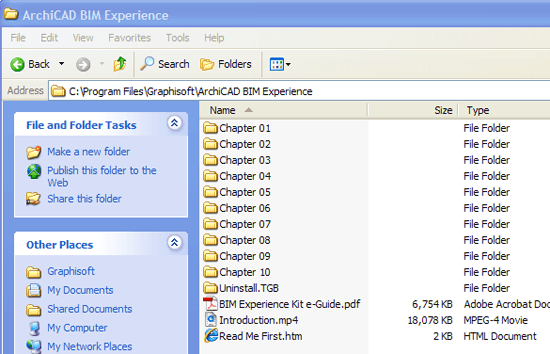
The BIM Experience Kit is a hefty download of about 400 MB; it is expected to be made available on CD this fall. It installs a PDF e-Guide with 10 chapters into a separate folder next to the ArchiCAD folder. Each chapter includes a progressively more developed version of the Massaro House project along with other support files. At the start of each chapter, one opens up the corresponding file to start fresh. This makes it easy to take breaks and resume when convenient, or to go back through a chapter a second time for review.
Innovative Approaches—The Movie Player
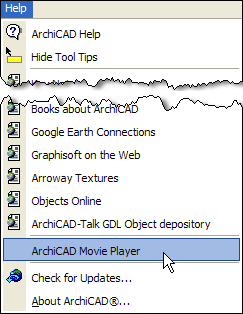
All the Graphisoft Interactive Training Guides use a number of innovative approaches to ease the learning process while covering as much ground as possible. In addition to the well-illustrated PDF guide, each ITG features a series of on-screen demonstration videos that are shown in a special Movie Player window running inside ArchiCAD.
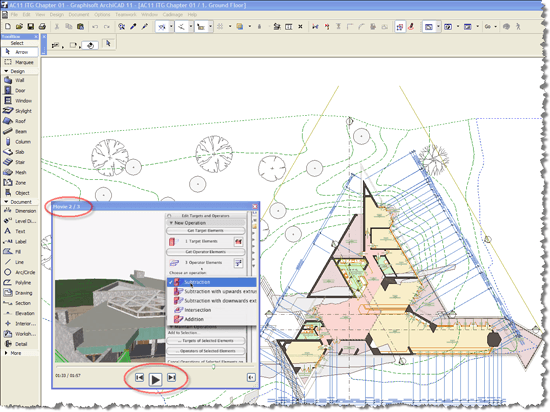
The videos run using standard playback controls while still allowing users to follow along, clicking and drawing, almost as if there was a personal trainer guiding the process. As each chapter is opened, the Movie Player switches to the appropriate video file. As each video concludes, the next one is queued up automatically, and will play simply by clicking on the Next button in the controller. In the screenshot below, the Movie Player window is entitled “Movie 2/3”: when Movie 2 finishes, Movie 3 for this chapter will start. The effect is effortless and the onscreen guidance is easy to follow.
The View Map Sets the Pace
ArchiCAD’s View Map is used to direct the learner to the place where each step is to be executed. By double-clicking on each View in turn, layers are turned on and off and the screen zooms to the appropriate location in the floor plan, 3D window or various other working views such as sections, elevations or details. Taking advantage of the flexible layering system, the tutorial shows cues (labels, numbers and arrows) on specific layers appropriate for each step along the way. The layers change at each step simply by clicking the View, so the visual guides are always in sync.
Favorites Simplify Settings
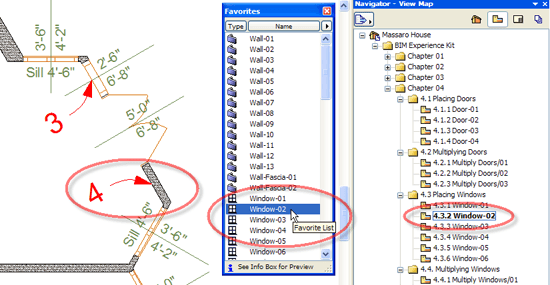
ArchiCAD’s powerful Favorites palette is employed to simplify selecting settings for each tool. By double-clicking on a Favorite, the active tool is set for the particular type of wall, window, door, or other element type for that step. The user experiences how these tools work effectively in plan, section, elevation and 3D views without having to spend time defining the right settings.
In the screen capture shown below, on the right hand side, step 4.3.2 of the tutorial is highlighted in the Navigator View Map. Double-clicking that View zooms to the plan area where the next two windows will be inserted into the project model (number 3 has already been placed, and number 4 is ready to be inserted; these labels are visual cues that are placed on layers and shown automatically when the View is activated). Double-clicking matching entry “Window-02” in the Favorites list sets the active tool to the correct type of window, and the user can simply click on the indicated location to place it.
Virtual Trace Shows It in Context
ArchiCAD 11’s new Virtual Trace feature is used in several places during the training sequence. It allows any view to be overlaid on top of or next to any other working view, much like trace paper. Virtual Trace has many applications: one story can be seen over another, an elevation or section can be viewed and snapped to while working on a floor plan, and drawings can be edited in the context of the layout sheet on which they are placed. 2D CAD drawings can be created or imported as xRefs into Worksheets; these can be visually compared dynamically with reference views of the model using a slider to reveal inconsistencies and study relationships.
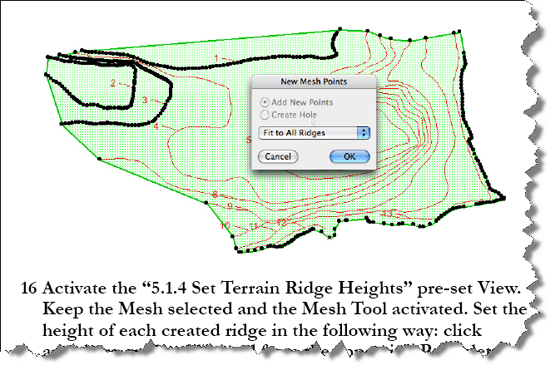
In this excerpt from the PDF e-Guide, shown below, a DWG topographic file is imported and used as the basis for creating terrain contour lines for the island.
Numbered labels (e.g., 2, 3, 4, etc.) appear onscreen in the View layers to guide the user. The Magic Wand (“space-bar-click”) automatically traces the DWG survey lines and creates the mesh ridges in order. A complex terrain model is created with just a handful of clicks.
BIM in Ten Easy Chapters
The entire building is constructed “from scratch” as one goes through the ten chapters. The effect is somewhat akin to how one can “paint by numbers” to create a painting. Although little effort is required to follow the steps, there is a great sense of satisfaction as the Frank Lloyd Wright design is actually built with one’s own hands!
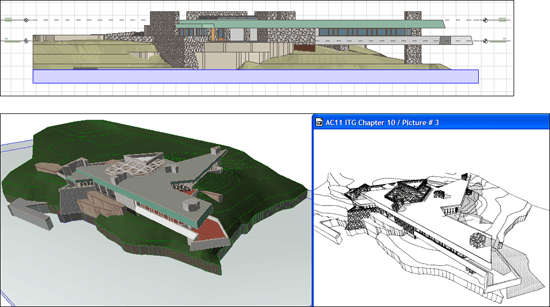
In the combination of screenshots shown below, a colored presentation elevation is juxtaposed with a 3D working view and an automatically-generated Sketch Rendering. The complete project has been constructed, piece by piece, through the course of the BIM Experience Kit.
The BIM workflow and relationships of Elements (walls, doors, 2D annotation, etc.), Views (plans, sections, etc.), Layouts (construction document sheets), Schedules, and Renderings are intuitively understood, learning by doing. While it is not possible to learn all about BIM in a short course, this self-paced tutorial does something remarkable: it gives CAD users a tangible experience of BIM, ArchiCAD-style.
After completing the BIM Experience Kit, Graphisoft’s other free Interactive Training Guides await the user who may continue learning in a similar fashion.

