ArchiCAD Tutorial | Quick Layers Palette (ArchiCAD Insights Tutorial)
bу Eric Bobrow, August 27, 2008
originally published in Cadalyst – AEC
Turn layers on and off, or lock them on the fly to suit your various needs.
ArchiCAD’s Quick Layers palette is a complement to the Layer Settings dialog box that allows layers to be turned on and off or locked on the fly to suit various needs. It is elegant, intuitive, and compact, and it has a memory of layer states so you can retrace steps and undo and redo layer manipulations instantly.
Layers are a classic, versatile way to control the visibility of elements and to focus or restrict the effects of editing to specific parts of the model or drawing. ArchiCAD’s concept of Layer Combinations is integrated beautifully into the definition of views to guarantee that drawings are created and maintained with predictable sets of information without effort. Whenever a view is created (typically by clicking the Save Current View button at the bottom of the Navigator palette’s View Map), the current layer combination is stored along with all other context settings. Double-clicking will activate a view and restore the layers to the proper state for that particular drawing or editing mode.
Unlike some BIM solutions that reject the concept of layers, ArchiCAD’s methodology is fully extensible and customizable by each user. It allows creative adaptation for all project types, sizes, and phases, as well as accommodating a range of user preferences and output requirements.
Showing the Quick Layers Palette
To show (or hide) the Quick Layers palette, simply select Window / Palettes / QuickLayers:
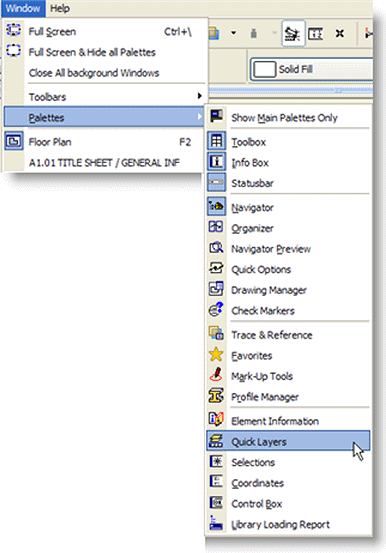 The palette will then appear onscreen, and can be dragged to a convenient location by its title bar. |
The palette will then appear onscreen, and can be dragged to a convenient location by its title bar.
The palette can be hidden by clicking on the Close button in the title bar, or selecting the Quick Layers command again. Of course, like all other commands in ArchiCAD, you can create a keyboard shortcut in Options / Work Environment / Keyboard Shortcuts or add a button to the Toolbar to show or hide the palette with a single click.
Retrieving Data on Hidden Layers
The left-hand button on the palette will toggle the visibility of all layers (hiding whatever layers are currently showing, and conversely showing the layers that were hidden):
One case in which I’ve found this very helpful is when there is data on a hidden layer, and I’m not sure which layer it is on. This situation can be tricky when dealing with information from a consultant, such as a survey that has been brought in as an xrefed DWG file. There may be many layers in the imported file, and it is hard to know what layers these elements are placed on. If you opens the Layer Settings dialog box and looks through the list, then guesses which layer(s) to turn on, it may be hit or miss. It may take several tries and some frustration to find and show all the data that is needed.
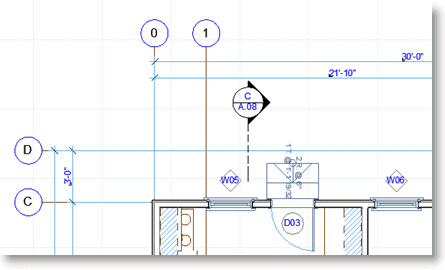
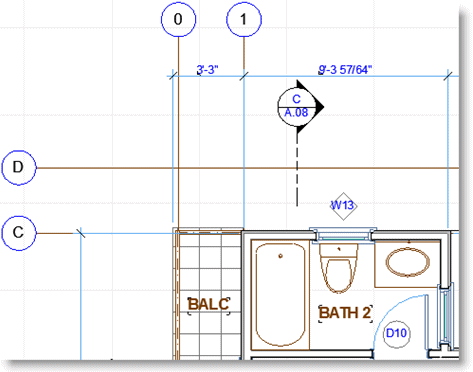
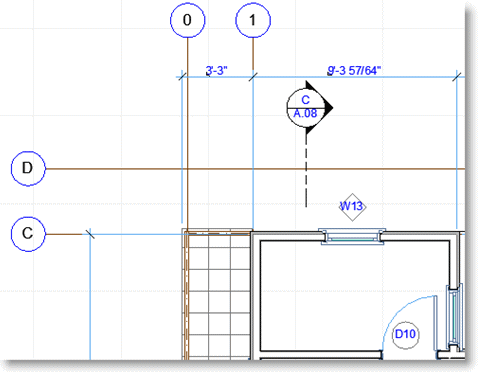
For example, let’s say you need to see the property lines to check on setbacks. Here is a floor plan without the property boundary data showing:
With QuickLayers, it’s very simple to do this:
- Click the Show/Hide Toggle button. Now all the layers that were hidden are showing, and all that were showing are now hidden.
- Select one or more (formerly hidden) elements you would like to make visible for the next modeling or editing task — in this case, one of the property lines and its label:
- With these items selected, click the button to Unlock the Selection’s Layer (this step is optional, and only necessary if the layer is locked and you will need to edit the data):
- With the items still selected, click the button to Hide the Selection’s Layer:
- Finally, click the Show/Hide Toggle button (the one on the far-left used in step 1).
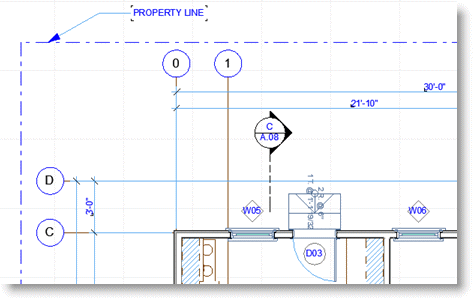
At this point, the “missing” property line layers are now showing, along with all the original visible layers.
Once you get used to this sequence, it takes only a few seconds: Toggle, Select, Unlock, Hide, Toggle back. You can virtually instantly “retrieve” information from one or more hidden layers using this method.
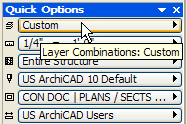
At this point, of course, the layer combination has been modified manually, and the Quick Options palette will show that a custom layer combination is in effect:
TIP: If you haven’t been using the Quick Options palette, this may be unfamiliar to you. It can be shown or hidden using Window / Palettes / Quick Options, or by clicking the Quick Options button (third from the left at the bottom left of most working windows, next to the drawing scale button). Quick Options is often docked or snapped below the Navigator, but may be moved around as desired. The Quick Options palette is also one of my personal favorites, since it allows instant manipulation not only of layer combinations, but also model view options and more. Note that the ArchiCAD v12 version of Quick Options (pictured above) has been expanded and now also controls pensets, partial structure display, and dimension settings.
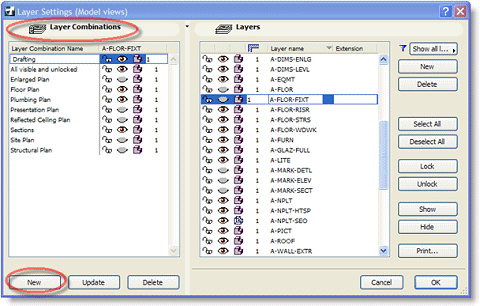
If you need to re-use this particular custom layer combination, either for modeling/editing or for output, then it may be appropriate and useful to create and name a new Layer Combination in the Layer Settings dialog box:
If you don’t need to re-use this custom layer combination, then when the current modeling or editing task is completed, simply choose a layer combination from the Quick Options palette, or double-click a view in the View Map to activate a layer combination.
Simplifying the Working View
Sometimes you need to focus on just certain elements, and others are nearby that make it harder to get the work done. In this case, there are two palette buttons you can use to simplify the working view. One of these buttons will selectively hide layers, while the other shows only the layers of selected elements.
Suppose in this view that you would like to work on the building partitions without the furniture, fixtures, and room names:
Select one or more fixtures and room labels, then click on the button to hide selection’s layer:
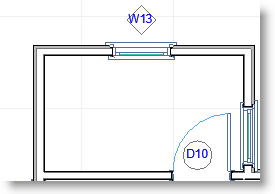
Now you have a simpler view in which to work:
If you’d like to hide additional layers, simply select items on those layers, and click the button again. After completing the task, you can step backwards through the layer manipulations by clicking on the Undo QuickLayer Actions button:
Layers that have been hidden will again be seen. After using this Undo option, you can redo one or more steps manipulating layers by clicking on the Redo QuickLayers Actions button, directly above it.
TIP: You can also hide or lock the layers of selected elements using the context menu (right-click), however then there is no Undo option. Sometimes I use the right-click method when I don’t expect to Undo my layer actions, and then re-establish the layer combination using the Quick Options palette or the View Map.
An alternative to the Hide Selection’s Layer method above is to select one or more elements (for example, the exterior and interior walls), then click the Hide Others’ Layer button:
Now (in this case) you have a view of just the walls:
TIP: If you’d like to hide door and window markers, these are not controlled by layer manipulation. Instead, they are turned on and off by the Model View Options, which can be accessed instantly in the Quick Options palette.
Sometimes it’s better not to hide other elements, but instead to lock their layers using the Lock Other’s Layer button:
Then it’s easy to select and drag or stretch elements only on certain layers, without disturbing others.
NOTE: In older versions of ArchiCAD, if you had a selection set in which some elements were on locked layers, you couldn’t drag or edit the selected elements, since ArchiCAD recognized that the locked elements would not be moveable. However, in recent releases of ArchiCAD (including at least v11 and v12), it is possible to Select All, or use an Arrow selection of elements, then move or stretch the elements on the unlocked layers, while leaving the elements on locked layers undisturbed.
I keep the Quick Layers palette visible onscreen most of the time while I work or teach ArchiCAD classes, since it is compact, and so useful to have at hand.


