ArchiCAD Tutorial | Optimizing Detail Creation, Referencing and Cataloging in ArchiCAD: Using Parametric 2D Objects and the Detailer Template (Part 2 of 3)
bу Eric Bobrow, April 27, 2007
AECbytes Tips and Tricks Issue #17
In last month’s Tips and Tricks article, we looked at ArchiCAD’s Detail Marker Tool and the basic process of creating a callout and editing a detail drawing. This month, we’ll look at how to use parametric 2D object components (from the standard ArchiCAD library) as well as the free, downloadable Detailer Template to work on these drawings more quickly and efficiently.
Detailer Objects
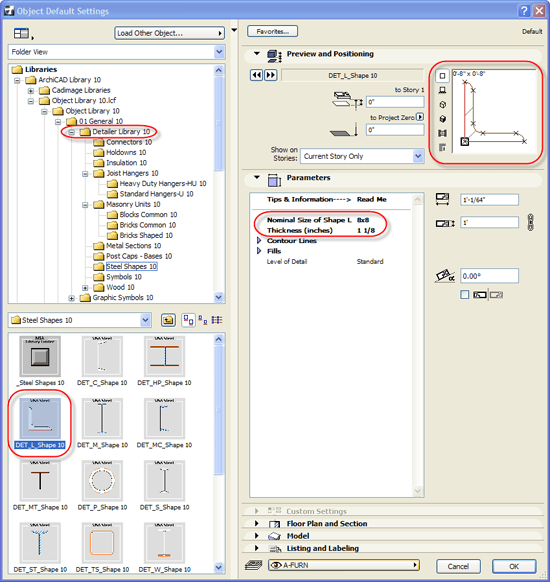
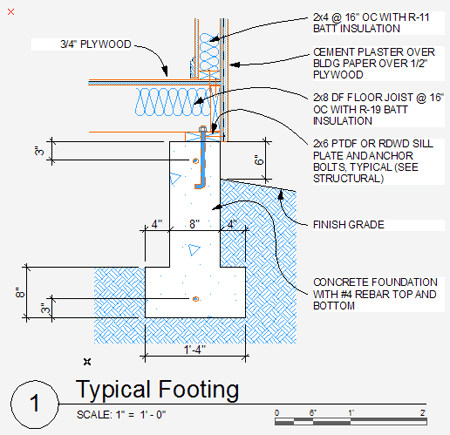
While one can add information into the “snapshot” by using simple lines and fills to represent architectural and structural components, it is often easier and faster to insert 2D objects from the standard ArchiCAD library. There are many elements useful for creating detail drawings (such as connectors, hold-downs, joist hangers, masonry units, steel shapes, etc.) in Section 01 General / Detailer Library.
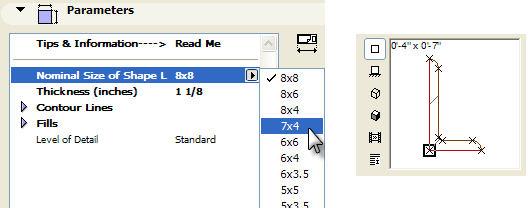
Many of these elements are parametrically controllable and can represent a variety of sizes in different ways to suit your needs. The steel shapes, for example, offer sizing from popup menus that are based on industry-standard steel reference tables.
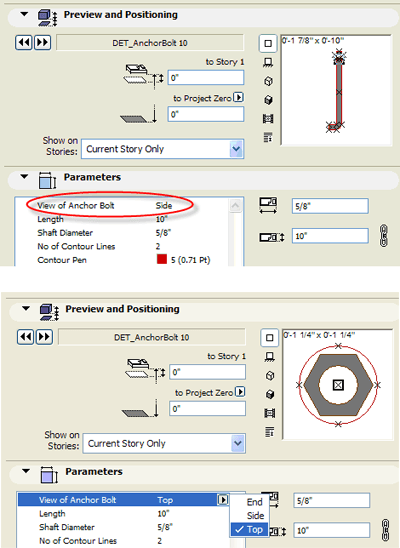
In other cases, objects will have multiple versions according to their orientation, in addition to their sizing options.
These objects will help you create details faster and more accurately, and can always be exploded (Edit menu > Reshape > Explode into Current View) if you need to tweak the linework manually. They make details more coherent since you are working with components that have architectural meaning and specification, rather than disconnected lines and fills.
Detailer Template and Tutorial Files
Selecting these objects to place into your details usually requires navigating in the library folders within the Object Settings dialog. However, ArchiCAD has a free Detailer Template that speeds this process considerably (visit this page on the Graphisoft website and download the ArchiCAD 10 Detailer Guide and Templates). I highly recommend going through the tutorial by Karl Ottenstein called AC10_Detailer_Users_Guide.pdf, which is included in the download.
TIP: For easy access to any PDF, place it into the Documentation folder within the ArchiCAD application folder. Then you’ll be able to open the PDF directly from the ArchiCAD Help menu.
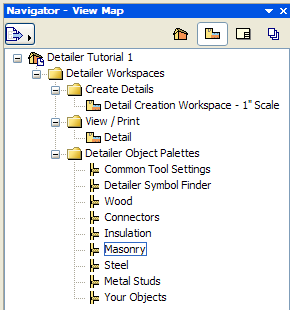
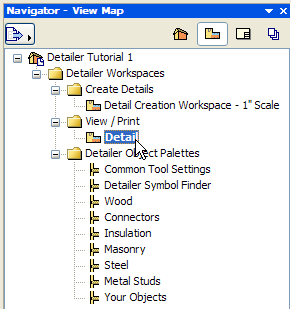
In the Tutorial files that accompany the Detailer Template, you’ll have very quick access to common detail components using the built-in Views to access Palettes for Connectors, Masonry, Wood, etc. You can use the Tutorial files as-is, or modify them to suit your needs.
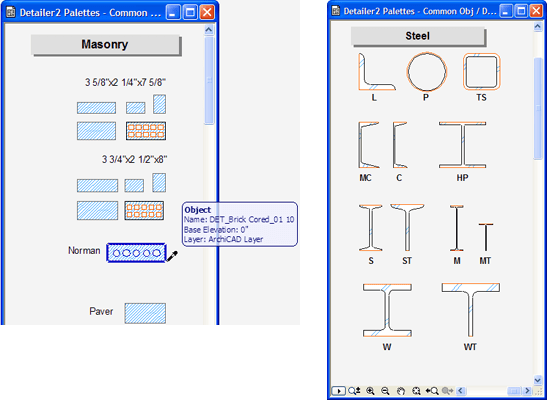
These objects are laid out in a pre-made Detail Window (identified below as “Detailer2 Palettes”), and when you double-click on the corresponding View, you’ll instantly see the elements you need. The various Palettes are really saved “Zoom” areas of this one Detail Window.
Use the Eye-dropper Tool (either from the Toolbar or by Option-clicking [Mac] or ALT-clicking [PC]) to pick up the settings of the object. Then return to your detail drawing and click to place the component.
TIP: When you use the Eye-dropper Tool, click the corner or center hotspot that will aid you to insert the object. When you click to place the element into your detail, that’s the corner or part of the object that will be placed there.
The Detailer Palette window can be repositioned wherever convenient, so that it shares your work-screen with the detail drawing itself.
There is an area of the Palette for adding your own objects, so the system is easily extensible to suit your needs or that of your firm. A Palette area for common tool settings is also included to give you instant access to your office standard linetypes, text, labels, dimensions, fills, etc.
TIP: Since only 2D elements can exist in a detail window, it is not possible to use the Wall tool directly to draw a composite wall. One option is to create each “skin” of a composite using Fills. A good alternative is to draw a composite wall in a Plan window, select Edit menu > Reshape > Explode to get the graphics as 2D, then Edit > Cut and return to the detail window and Paste.
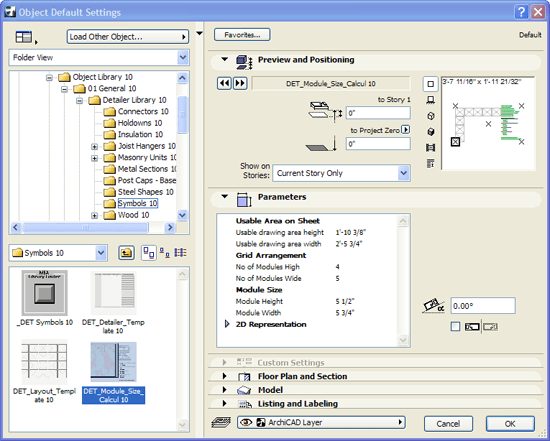
The Detailer Library / Symbols folder has built-in objects to help you place your drawings neatly into a grid on your layout sheet. The DET_Module_Size_Calcul 10 object is used to quickly figure out the size for each grid module, and the DET_Layout_Template 10 element can create a full sheet grid instantly. Full instructions for how to use these objects and customize them to match your preferred sheet size and grid system are found in the PDF guide. (Note: when using a grid system, you will also want to set up a Master Layout with the Grid feature turned on to match the module system.)
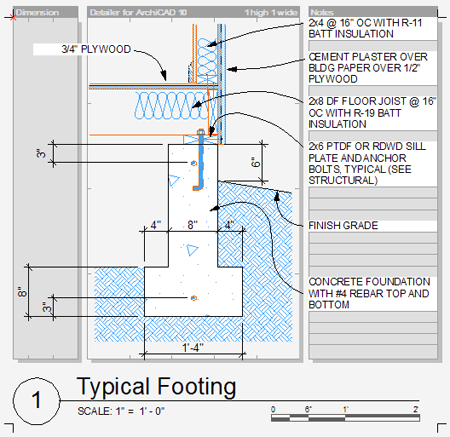
The Detailer Tutorial has a pre-placed guide object DET_Detailer_Template 10 that helps to maintain consistency on a detail sheet, making it easy to size details to units of the grid module (1 high x 1 wide, 2 high x 1 wide, 1 high x 2 wide, etc.). This template object also has areas delineated for notes and dimensions that make it easy to line them up neatly.
When you are done creating the detail drawing, switch the Navigator View from Detail Creation to View > Print Detail, which switches the Layer Combination and hides the template guide object.
Then your detail is ready for printing individually, or to be copied into your project.
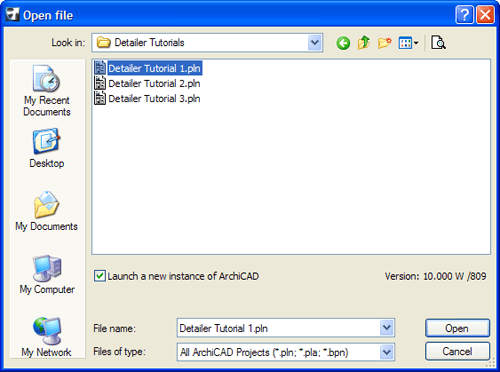
You can access the Detailer Template and objects separately from your actual project (File menu > Open > Detailer Tutorial 1.pln; remember to check the box to Launch a new instance of ArchiCAD):
To work on details in this approach:
- Copy a “raw” detail drawing from your project detail window (Arrow tool, Select All, Copy)
- Switch to the Detailer Tutorial file and Paste
- Edit as desired, using Detailer objects as well as manual linework and fills, etc.
- Turn off the Detail Template using the Navigator View or Quick Options Layer Combination
- Select All, Copy
- Switch back to your project, and Paste back into the detail drawing window
You can also integrate the Detailer palettes into your active project. Full instructions for how to add the Detailer palette into a project or even an office standard file template are included in the Detailer PDF guide. Then you can have access to the full power of the Detailer environment without switching out of your active project.
In the third and concluding section of this article, to be published in next month’s Tips and Tricks, I’ll go over some approaches to organizing and cataloging your details. You can compile your details into one or more reference files that will give you easy access so you can reuse and place appropriate ones into active projects.

